Hosting a website in AWS cloud
(Micheal Wong, October 2020)
In this blog, we will describe how to host a static website in Amazon Web Services cloud.
Website with our own domain
When we learn to write html and css, our teacher probably asks us to host our website in some free webservers.
Good news is that our website is live. Bad news is that the website domain is not ours.
In the past, we have to spend a few hundred or thousand dollars to host our website in a vendor's webservers.
Today, we only spend a few dollars to host a static website in Amazon Web Services (AWS) cloud.
Preparation
Before hosting a website, we should register a domain name, and open an account in AWS.
In our case,
- we registered our domain name in www.godaddy.com which it costs us about US$5.0 per year.
- we opened an account in AWS which it costs us about USD1.0 per month (depended on the size of website).
S3 buckets
Let say that we register a domain name of "ourdomain.com" in godaddy.com and write a website including webpages of index.html and error.html.
If we want people to access our webiste by typing a URL of "ourdomain.com" or "www.ourdomain.com", we should:
- Log in AWS.
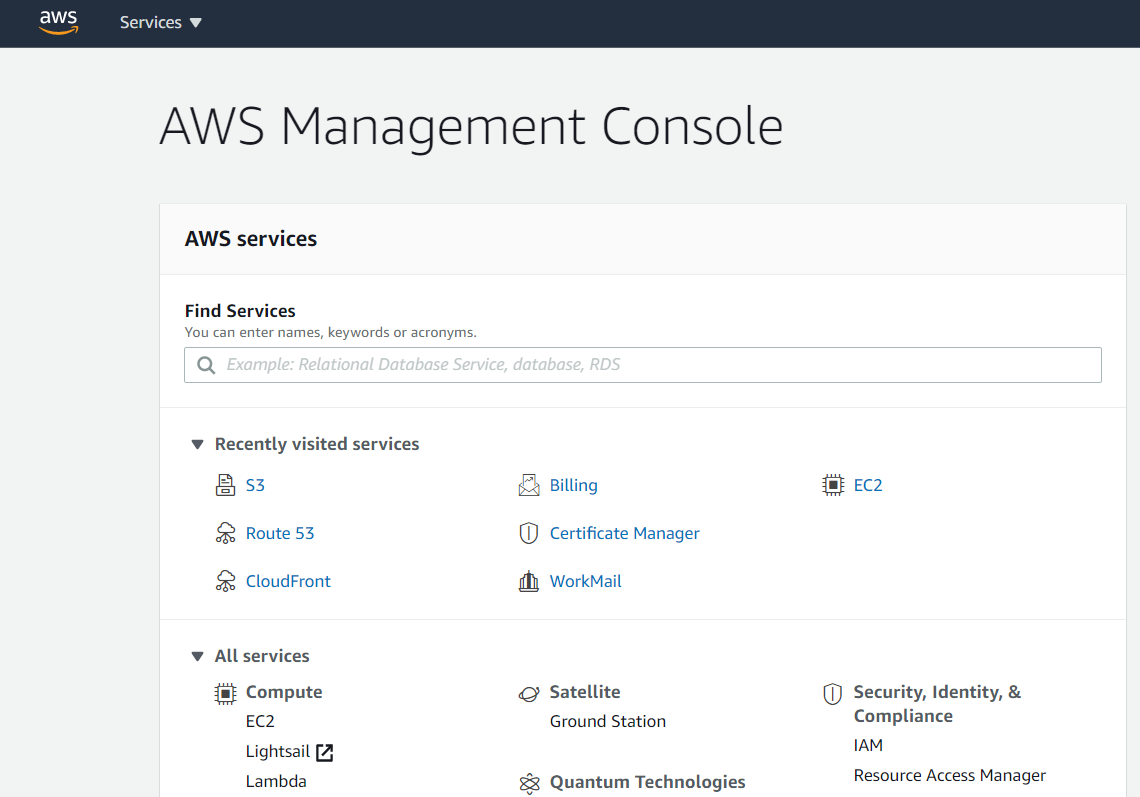
- In AWS Management Console (press the left-top AWS button), type in "S3".
(Press Here to see the screen)
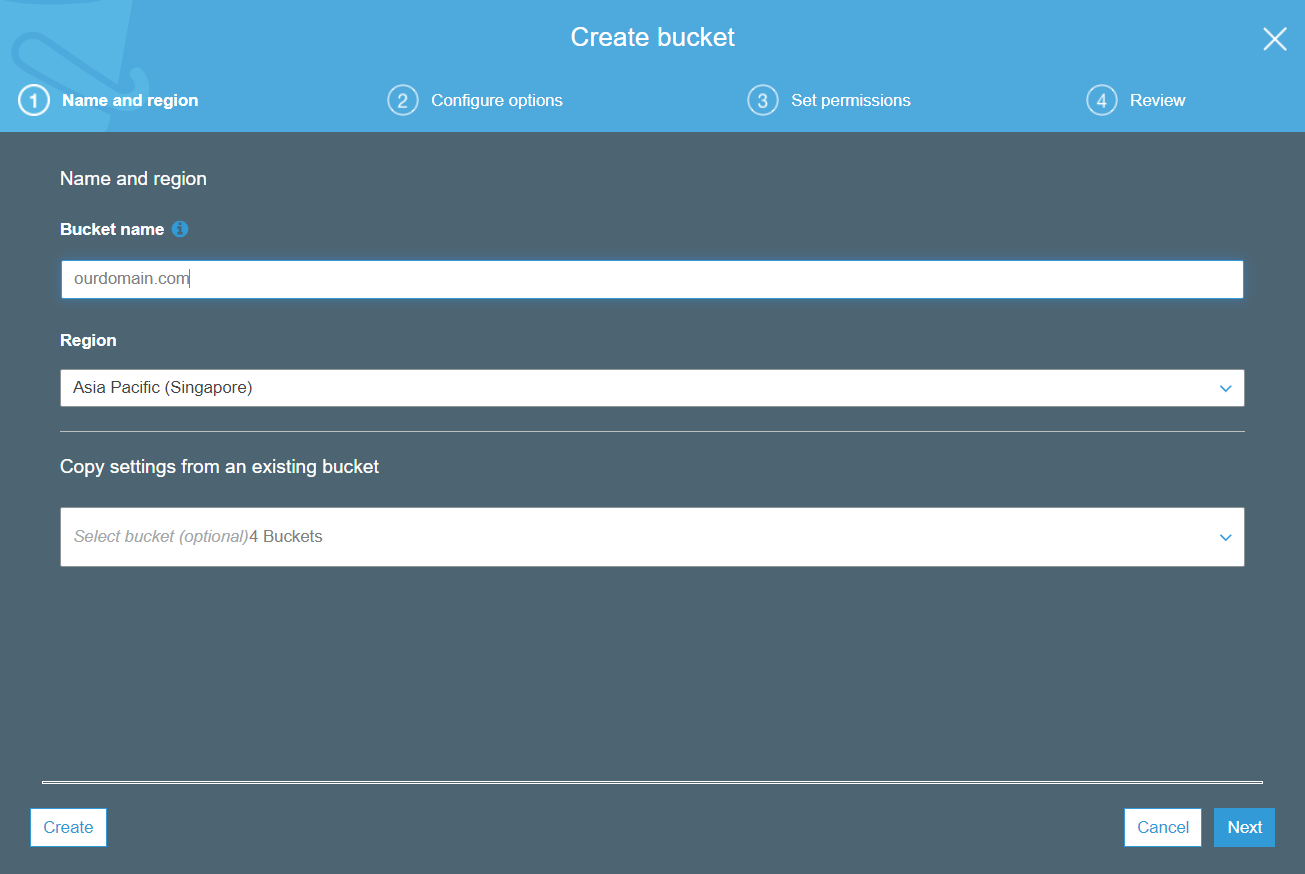
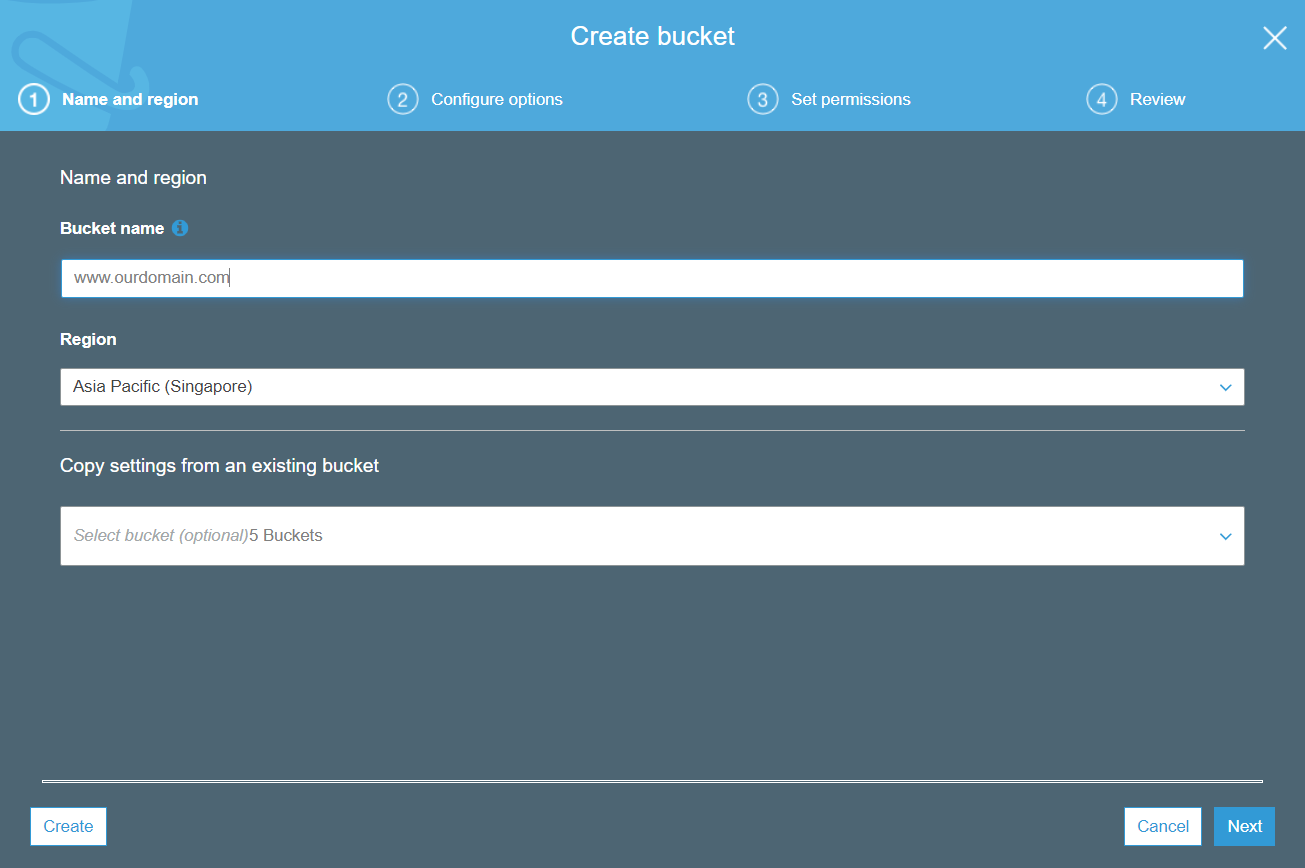
- In S3, create a bucket with the Bucket Name: "ourdomain.com".
(Press Here to see the screen)
- In S3>Overview, upload our website including html, css folder, images folder.
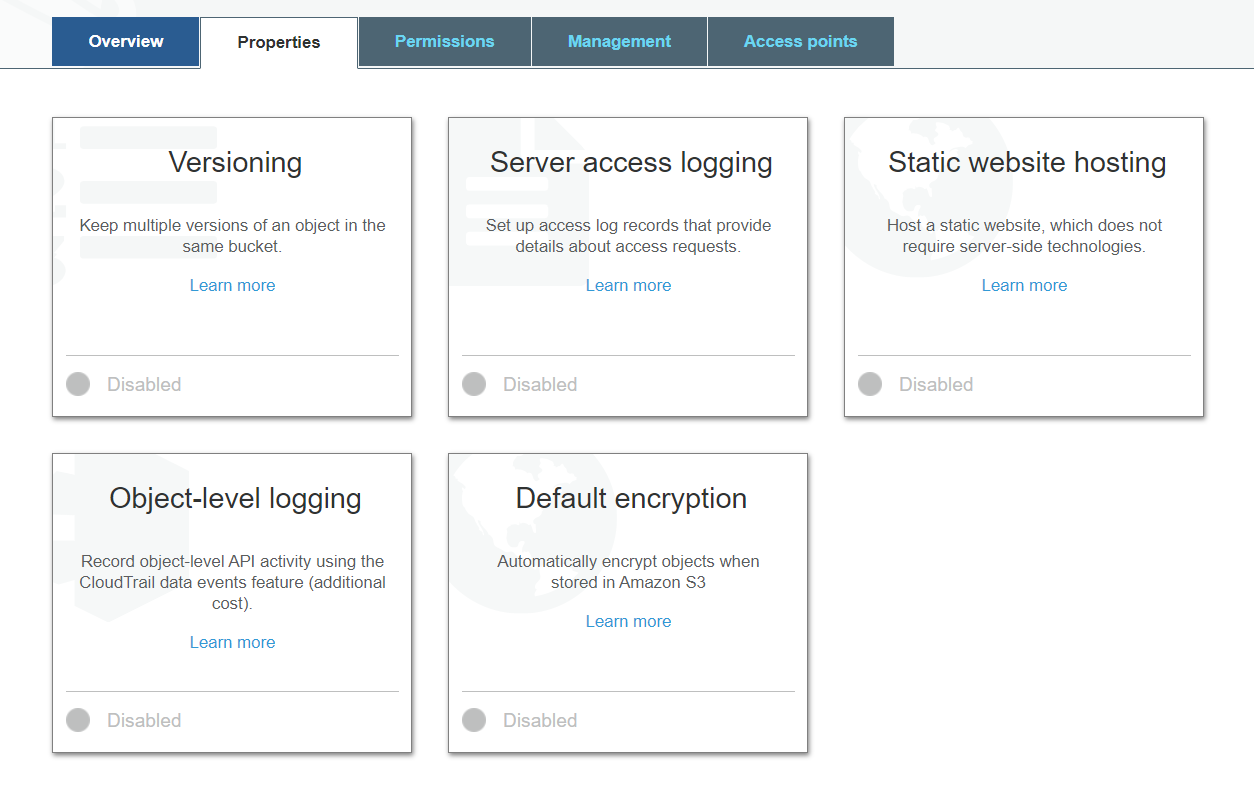
- In S3>Properties, select "Static website hosting".
(Press Here to see the screen)
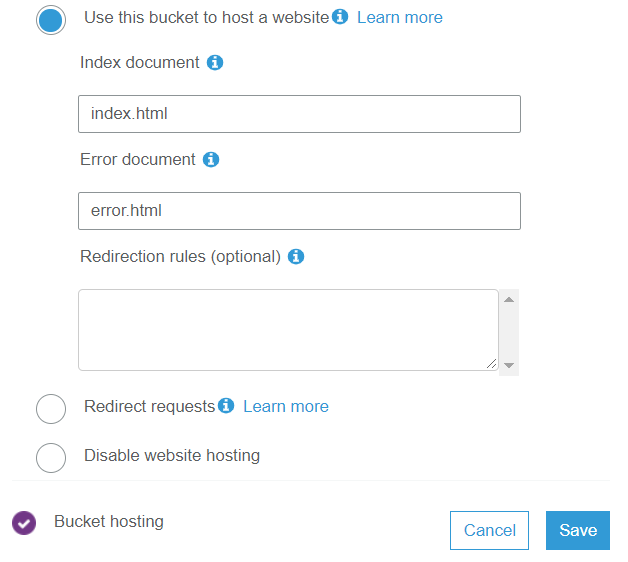
- In S3>Properties>Static website hosting, select "Use this bucket to host a website".
- Fill in index and error documents with "index.html" and "error.html" respectively.
(Press Here to see the screen)
- In this moment, we can access our website from the Endpoint.
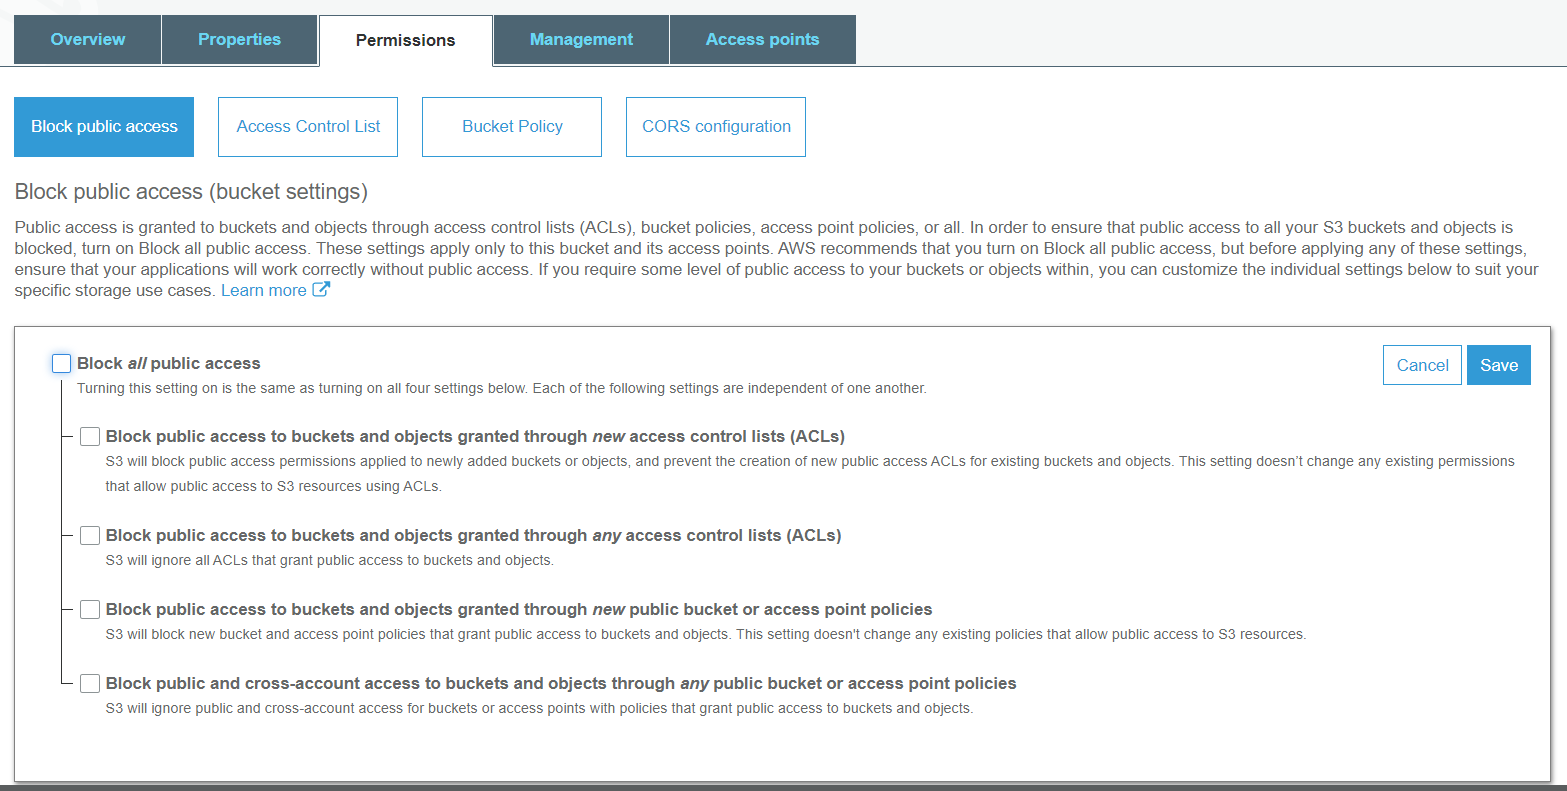
- In S3>Permissions>Block public access, select "Edit" and "Unselect" all Block.
(Press Here to see the screen)
- In S3>Bucket Policy>, copy the policy below:
(Press Here to see the screen)
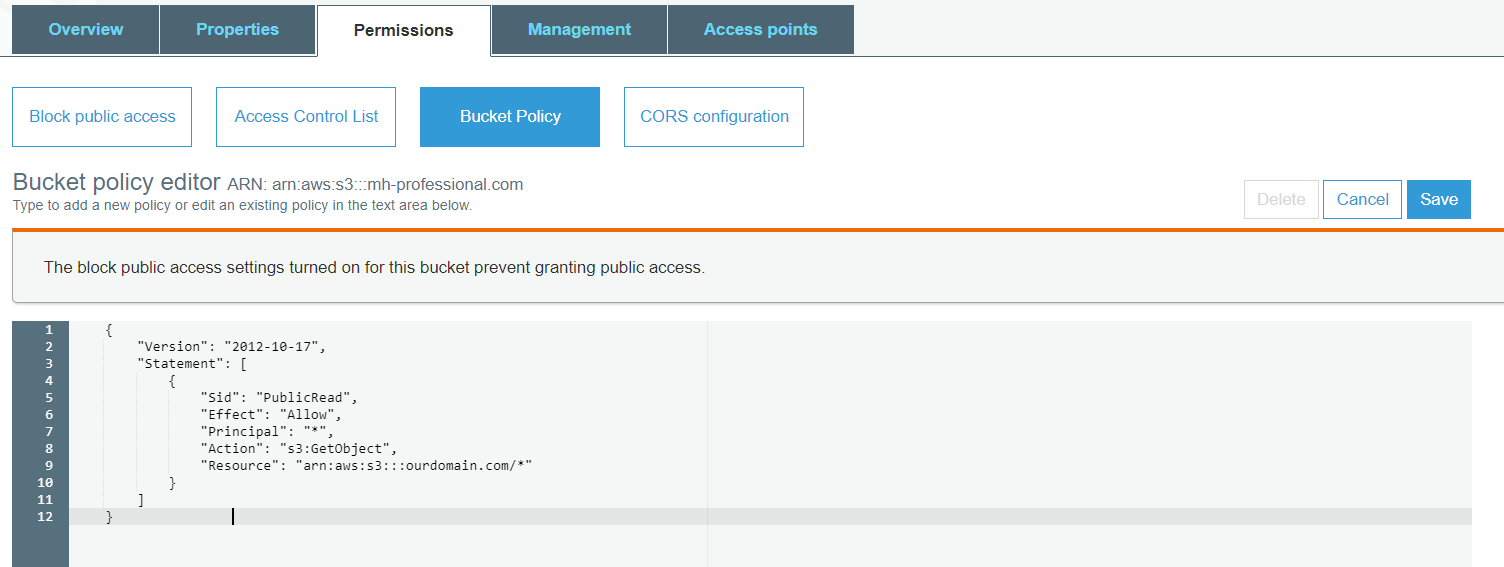
{
    "Version": "2012-10-17",
    "Statement": [
        {
         "Sid": "PublicRead",
         "Effect": "Allow",
         "Principal": "*",
         "Action": "s3:GetObject",
         "Resource": "arn:aws:s3:::ourdomain.com/*"
        }
    ]
}
- Remember to change the "ourdomain.com" to our actual domain name.
- Alternatively, we can also find and copy the bucket policy from AWS website.
- In S3, create another bucket, "www.ourdomain.com".
(Press Here to see the screen)
- We DO NOT NEED to upload anything in this bucket.
- In S3>Properties>Static website hosting, select "Redirect requests".
- In S3>Properties>Static website hosting>Target bucket or domain, fill in "www.ourdomain.com".
(Press Here to see the screen)
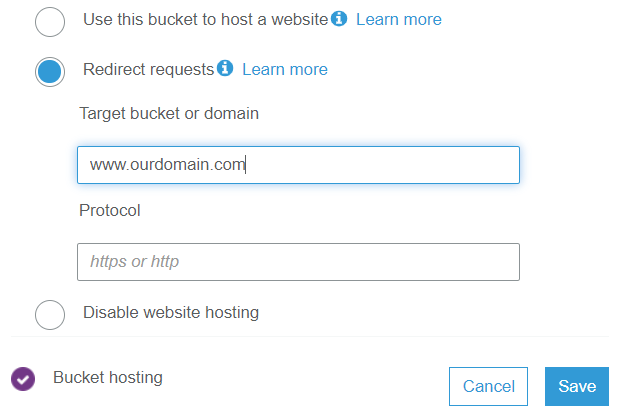
- In S3>Properties>Static website hosting>Protocol, fill in "https".
- Repeat step 9) and 10). Remember to change the domain name to "www.ourdomain.com".
- We have stored our website in S3 Bucket, then, we should configure the Route 53.
- In future, if we want to change our webpages or add new webpages, we can update them in "ourdomain.com" S3 bucket.
Return to top, or goto
Route53,
Cloudfront,
Certificate Manager.
Route 53
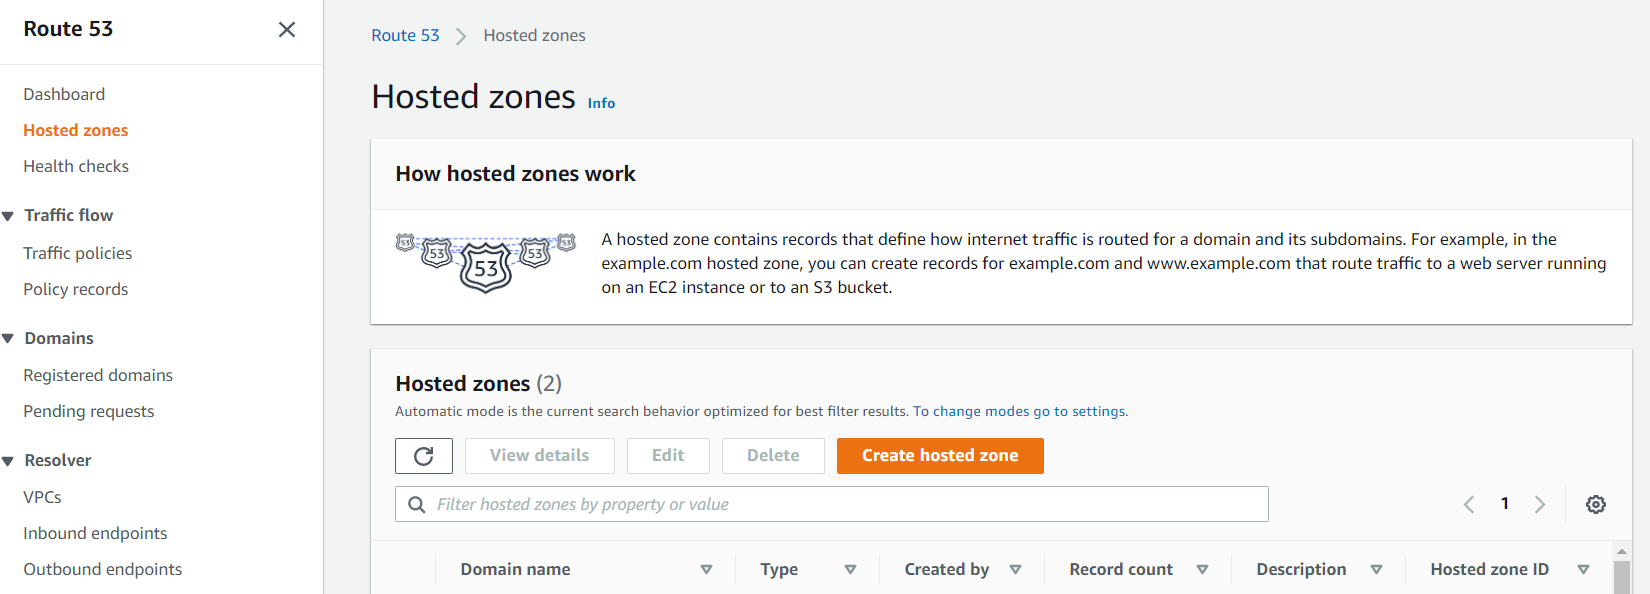
- In AWS Management Console (press the left-top AWS button), type in "route 53".
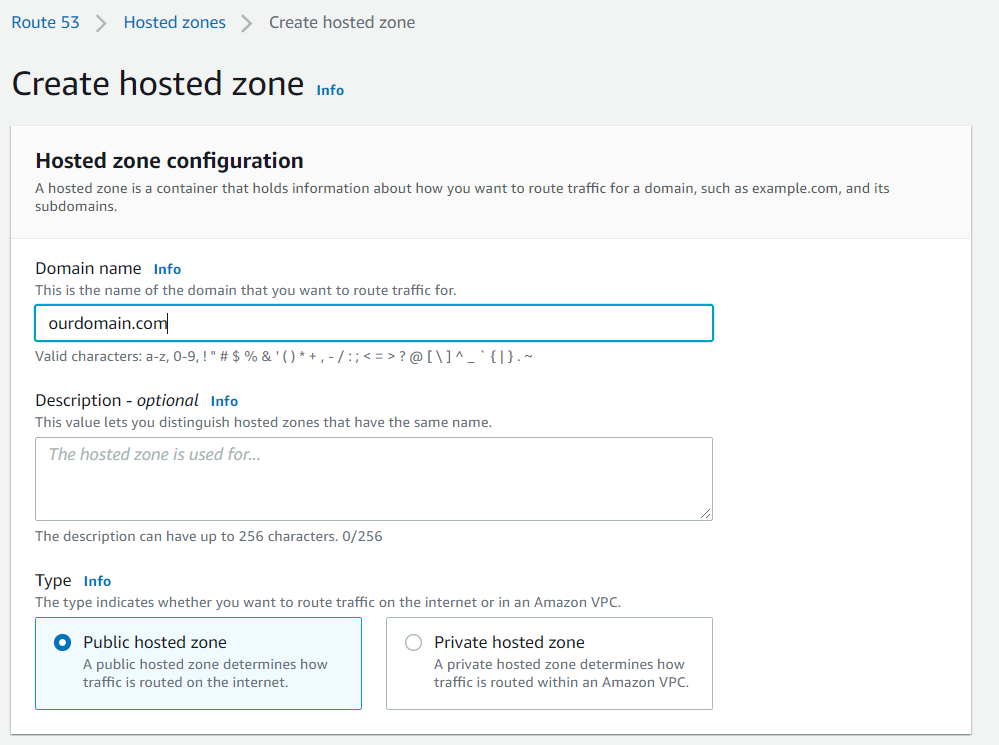
- In route 53>Dashboard, create hosted zone in name of ourdomain.com.
(Press Here to see the screen)
- There should be two record, "NS" and "SOA".
(Press Here to see the screen)
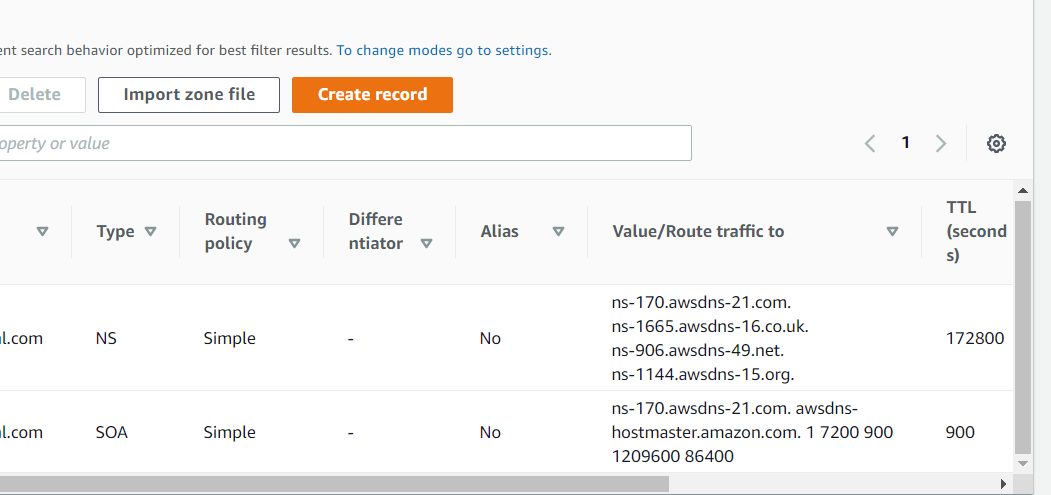
- NS represents "Nameservers".
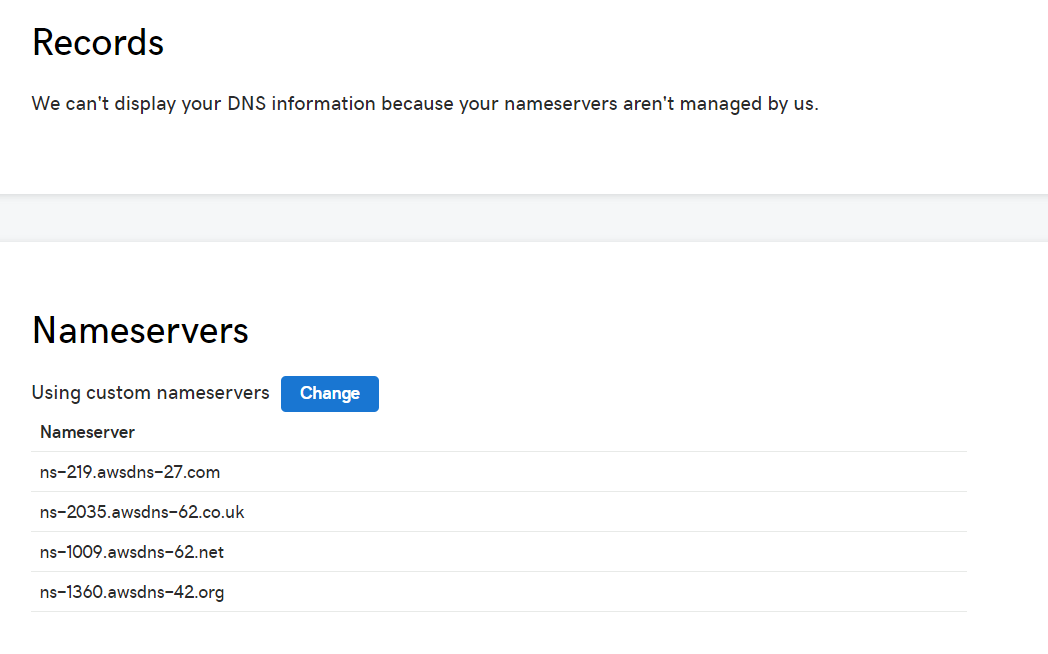
- In this moment, we should sign in our godaddy.com account.
- In our godaddy account, find our domain and select "DNS".
- In our godaddy account>advanced setting, copy all four NS from AWS to godaddy.
(Press Here to see the screen)
- Close our godaddy account
- We will re-visit Route 53 after we configure the Cloudfront. Please press goto Cloudfront section.
After the status of CloudFront is Deployed, we shall prepare the final configurations.
- In Route 53, select Hosted zones.
- In Route 53>Hosted zones, selected our domain name.
(Press Here to see the screen)
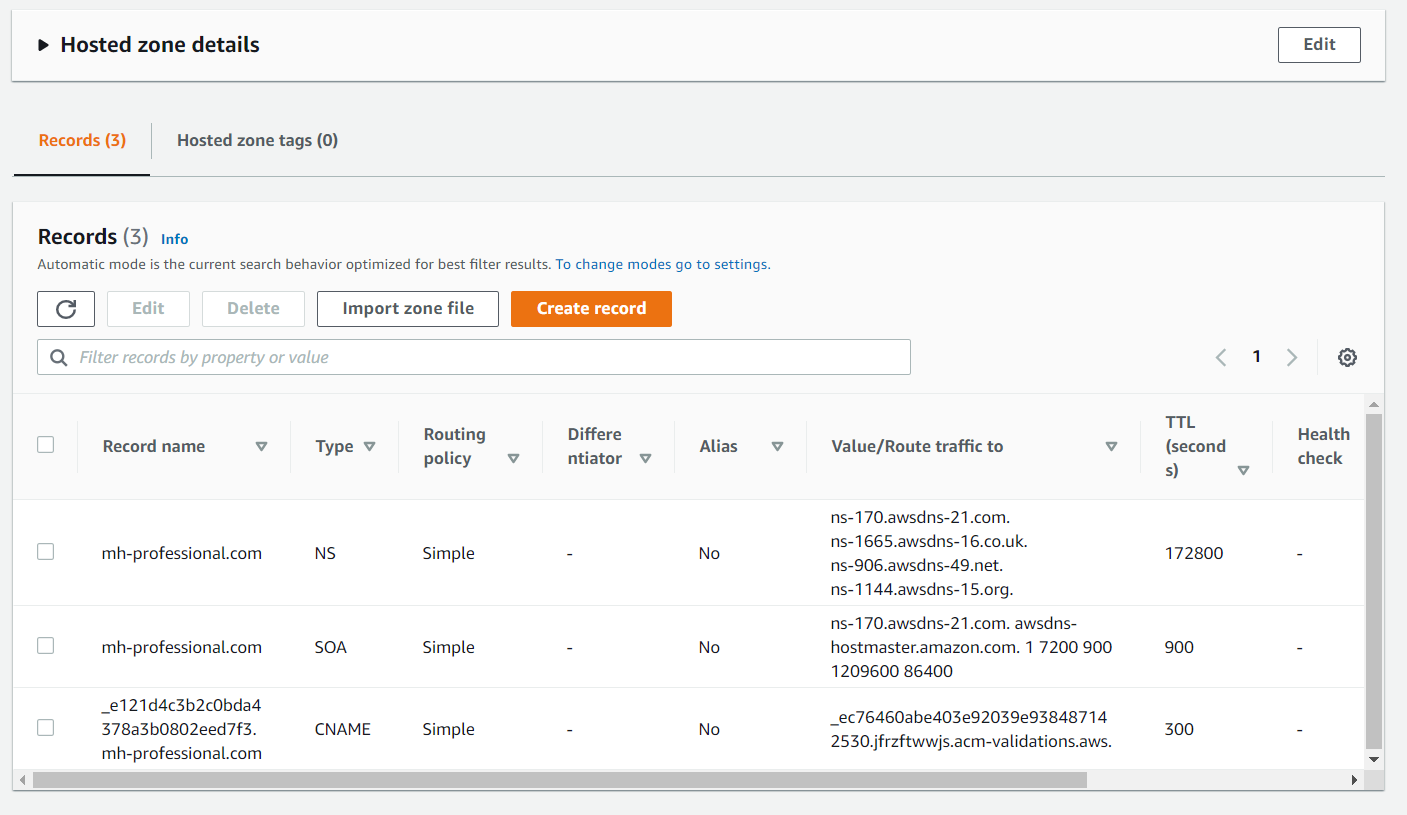
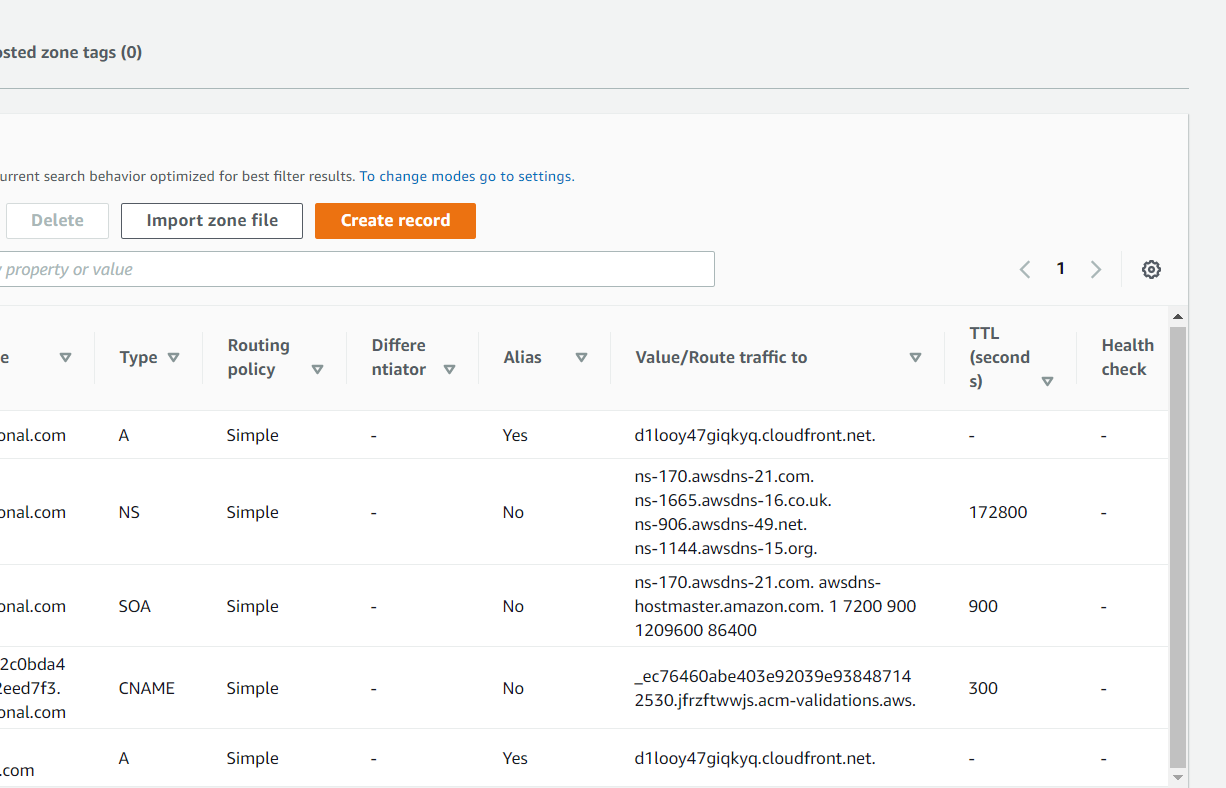
- In this moment, we should have three records, NS, SOA, and CNAME.
(Press Here to see the screen)
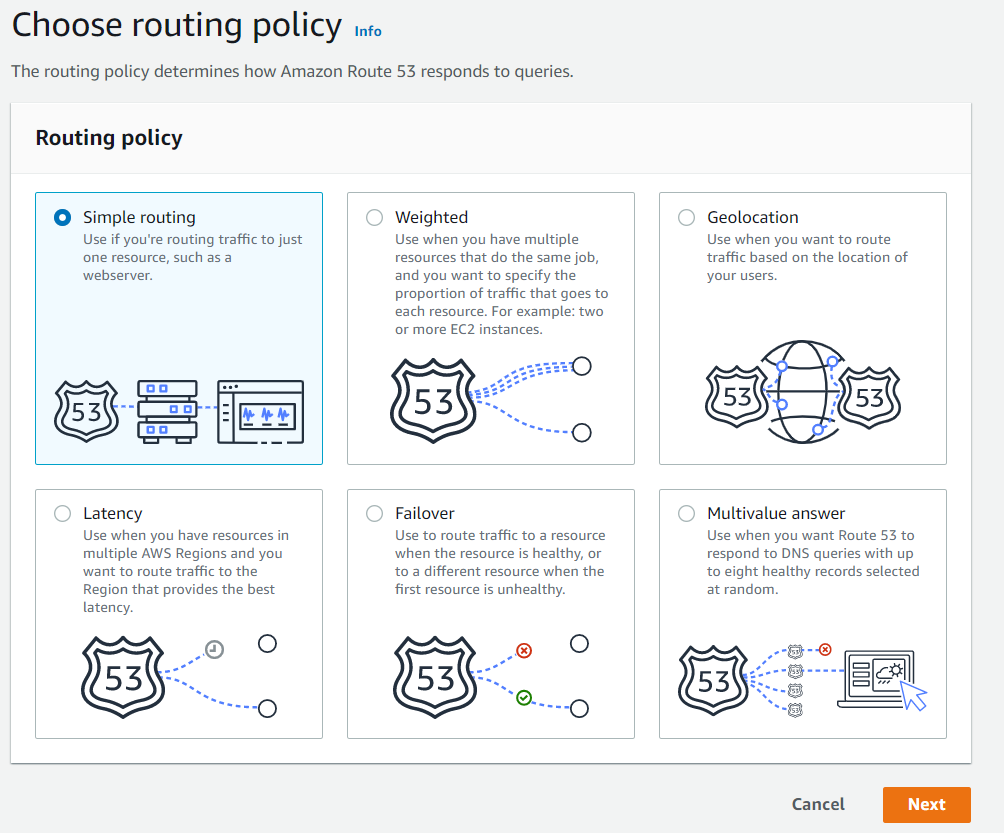
- In Route 53>Hosted zones> ourdomain.com, select Create record->Simple routing->next.
(Press Here to see the screen)
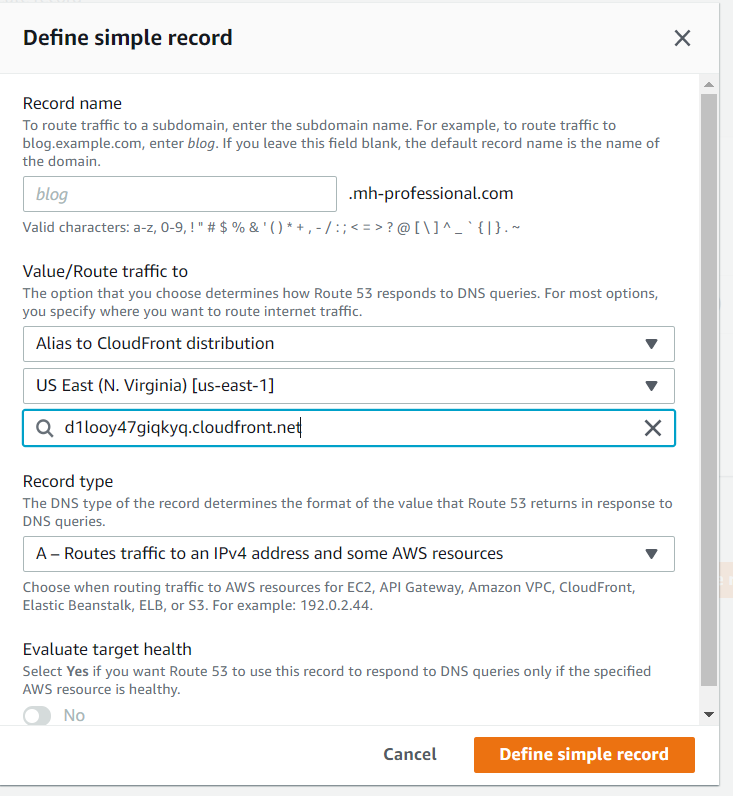
- Under Value/Route traffic to, select Alias to CloudFront distribution,
- then, select US East (N. Virginia)[us-east-1],
- then, select our newly created 'somestrings'.cloudfront.net. Then, press Save changes.
(Press Here to see the screen)
- Similiar to Step 4, create another record by pressing Create record->Simple routing->next.
- Under Record name, add www in front of .ourdomain.com
(Press Here to see the screen)
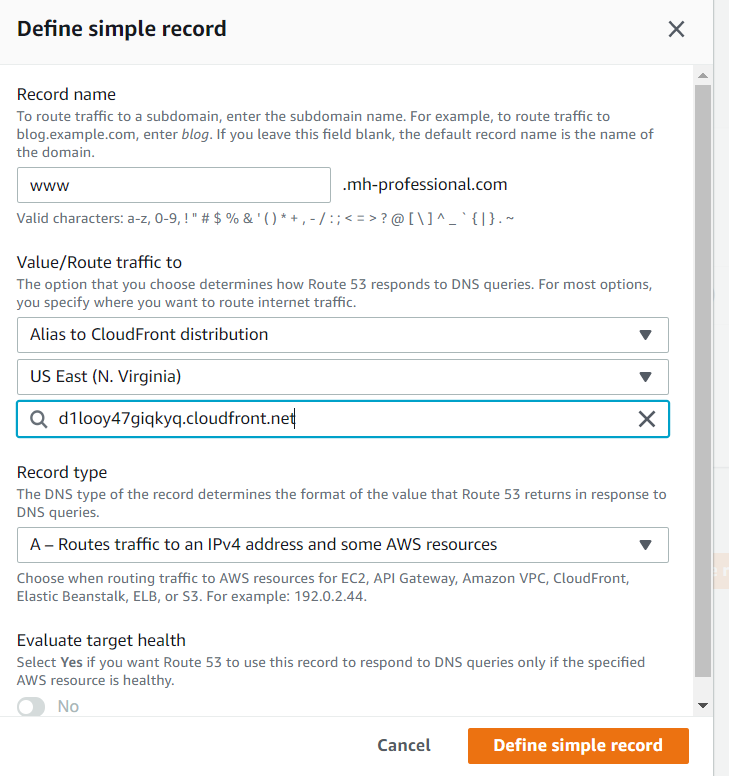
- Repeat the steps (5), (6) and (7).
- In this moment, we should have five records, A, NS, SOA, and CNAME, A.
(Press Here to see the screen)
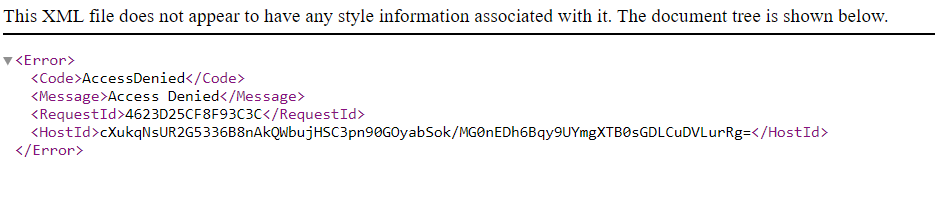
- Wait and try our URL, "www.ourdomain.com" or "ourdomain.com". We may obtain an error page.
(Press Here to see the screen)
- Be Patient. We will have the correct webpages after a while. Finally, we host our website in AWS successfully.
Return to top, or goto
S3 buclets,
Cloudfront,
Certificate Manager.
CloudFront
- In AWS Management Console (press the left-top AWS button), type in "CloudFront".
- In CloudFront, press Distribution, then press "Get Started".
- Under Origina Domain Name, select the correct S3 bucket (i.e. without www.), press Create Distribution.
(Press Here to see the screen)

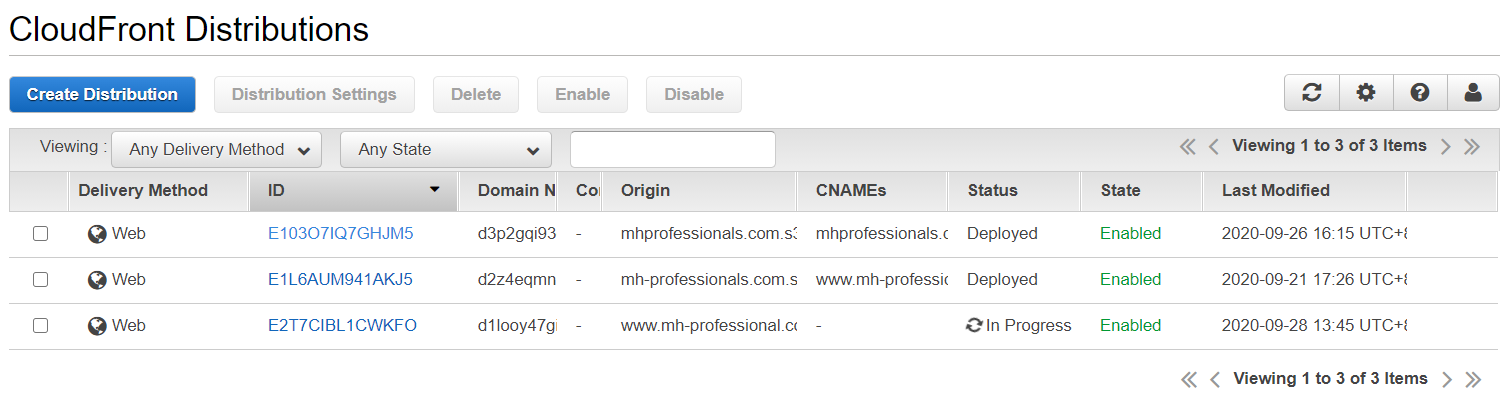
- In CloudFront>Distributions, select ourdomain.com
- In CloudFront>Distributions>General, select Edit
- Under Alternate Domain Name (CNAMEs), fill in "ourdomain.com" and "www.ourdomain.com" on the first and second lines respectively;
(Press Here to see the screen)
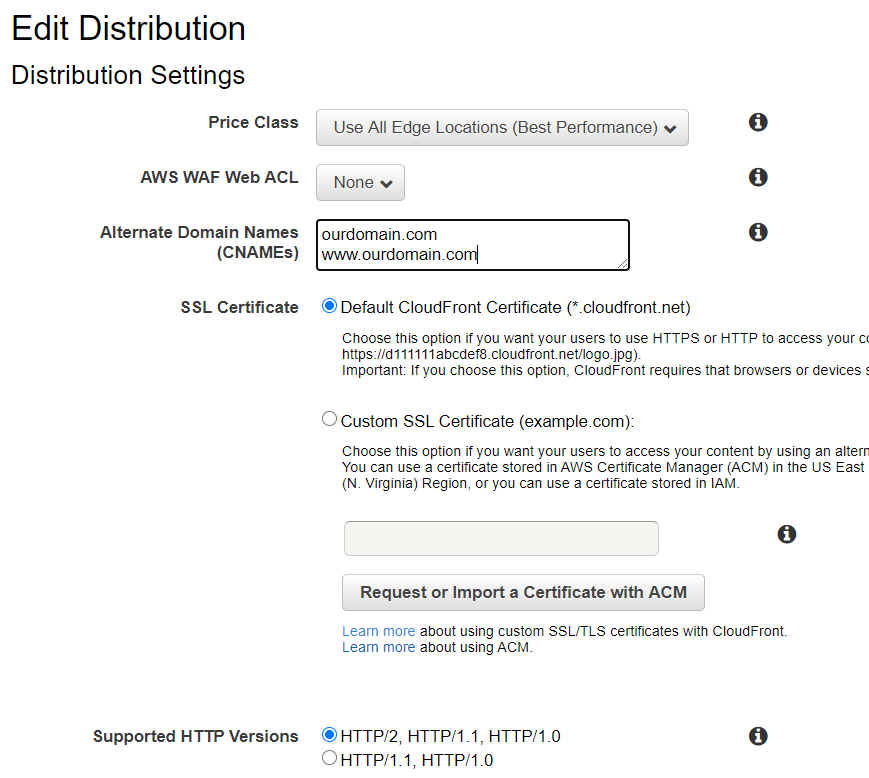
- Then under "SSL Certificate", press "Request or Import a Certificate with ACM".
- In this moment, we will be re-directed to Certificate Manager.
- We will re-visit CloudFront after we obtain a SSL certificate. Please press goto Certificate Manager section.
After we have obtained the SSL certificate, we should continue to configure the CloudFront.
- (Repeat step 4 above) In CloudFront>Distributions, select ourdomain.com
- (Repeat step 5 above) In CloudFront>Distributions>General, select Edit
- (Repeat step 6 above) Under Alternate Domain Name (CNAMEs), fill in "ourdomain.com" and "www.ourdomain.com" in the first and second lines respectively;
- Then, under "SSL Certificate", (a) select "Custom SSL Certificate (example.com)", and (b) find and select our newly created SSL in the box below.
- Under Default Root Object, add index.html
- Press the "Yes, Edit" button on the lowest right corner of this page.
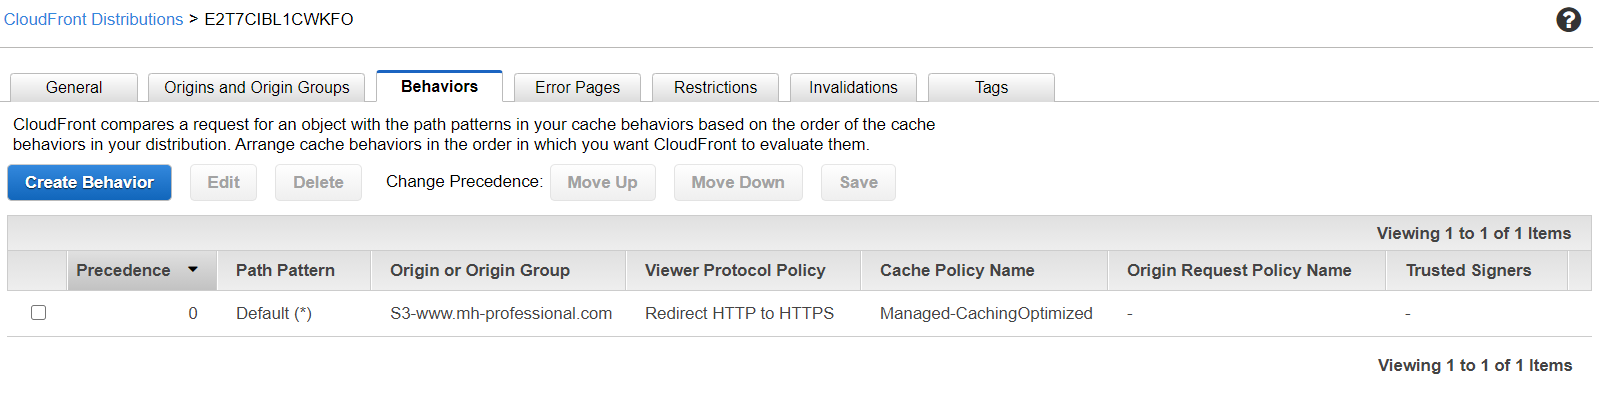
- Under CloudFrontDistribution>Behaviours, change the Viewer Protocol Policy from "HTTP and HTTPS" to "Redirect HTTP to HTTPS" .
(Press Here to see the screen)
- After a while (a few minutes or hours), the status will be changed from In progress to Deployed.
(Press Here to see the screen)
- Then we should return to Route 53 and configure some final steps.
Return to top, or goto
S3 buclets,
Route53,
Certificate Manager.
Certificate Manager
- We may be re-directed from CloudFront, or in AWS Management Console, we type in "Certificate Manager".
- In the upper-right corner, change the location to US East (N. Virginia) us-east-1.
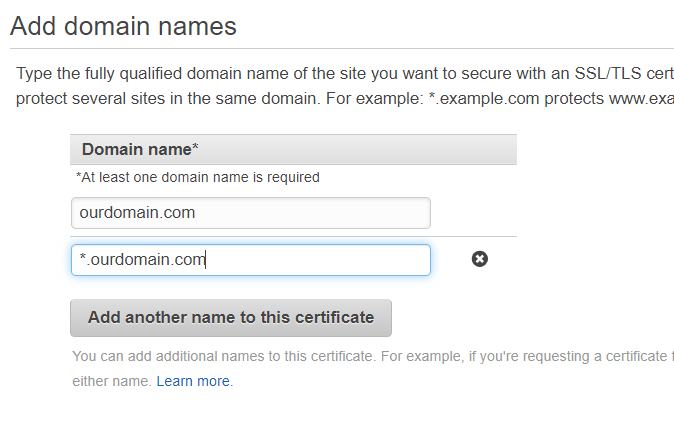
- Select "Request a certificate" .
- Under "Domain name*", add ourdomain.com.
- Press "Add another name to this certificate, and add *.ourdomain.com.
(Press Here to see the screen)
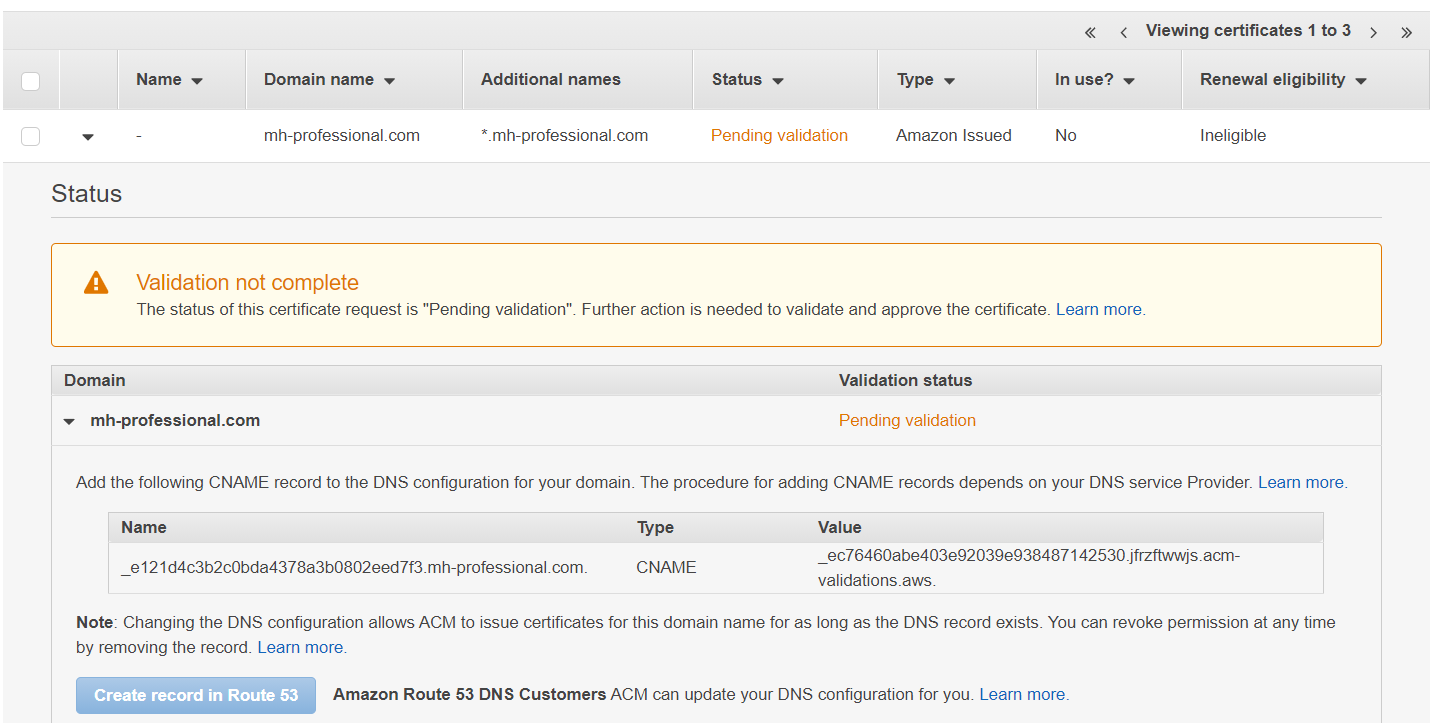
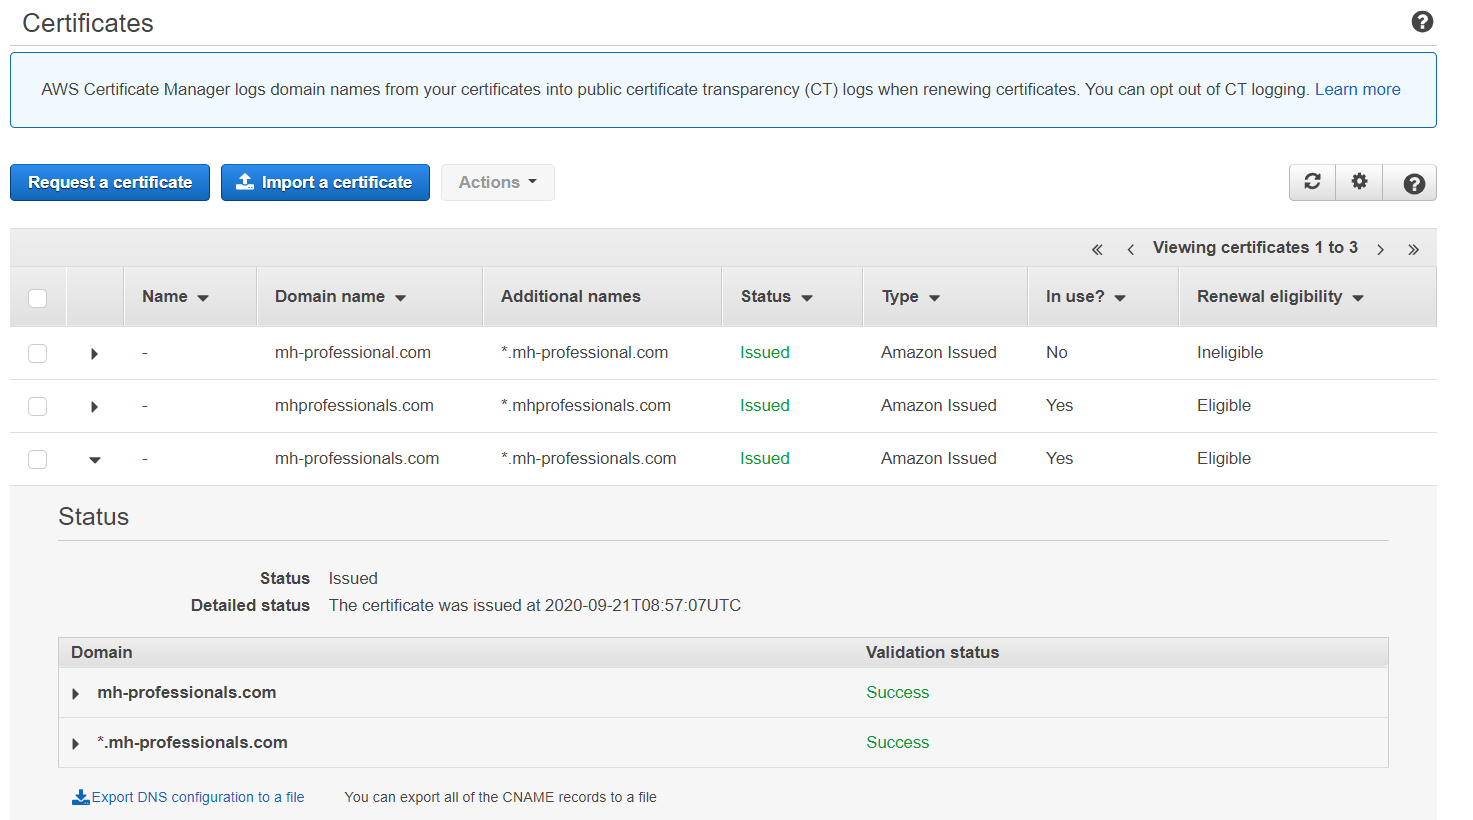
- Wait for a while until the Validation statue changed from "Pending validation" to "Issued".
(Press Here to see the screen)
- If we do all the procedures above correctly, we will only wait for less than 5 minutes.
(Press Here to see the screen)
- If we do something wrong previously and redo "CloudFront" / "S3" procedures, we may have to wait for an hour or more. Be Patient.
- During the waiting time or after the SSL certificate is issued, press the button of Create records in Route 53. Once the button is pressed, a CNAME record is created in Route 53.
(Press Here to see the screen)
- We may return to CloudFront while we are waiting for the SSL certificate to be issued. Please press goto Cloudfront section.
Return to top, or goto
S3 buclets,
Route53,
Cloudfront.
Q & A
How long do I have to wait for the deployoment of CloudFront?
If the website is fresh (i.e. a new DNS), you will only wait for a few minutes.
In contrast, if I disconnect a website from wix.com, it takes hours to be deployed.
How long do I have to wait for the issuance of SSL certificate?
If the website is fresh (i.e. a new DNS), you will only wait for a few minutes.
If not, you will wait for an hour or more.
If you have been waiting for over 48 hours, you should have made some mistakes. Please redo it.
Is it OK for me to select Asia Pacific (Hong Kong) ap-east-1 in S3 bucket?
You will be in trouble when you select CloudFront in Rount 53.
For Asian, please use Asia Pacific (Singapore).
I believe that I do everything correctly, but the website reports error.
The CloudFront requires time to deploy the websites to DNS servers around the Globe.
Patience is the key to success.
After 72 hours, the website is still not working. What should I do?
Practice makes perfect. Delete all the records. Redo it.
Micheal Wong is the founder of MH Business Services Company. He is the core maintainer of the website of MHprofessionals. Currently, he is studying MSc in Computer Science in City University of Hong Kong.
about -
email -
linkedin